Friday, May 30, 2014

Yogurt Cake


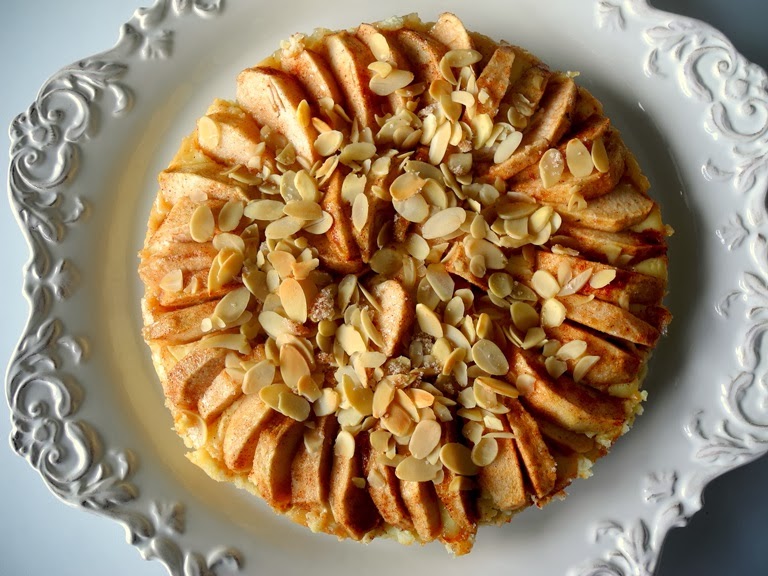
This recipe has become a regular around here. It comes together quickly with ingredients I usually have on hand, tastes wonderful warm or cool, and is a great background for a variety of sauces and toppings. Oh, and it keeps well, too, covered, on the counter. Credit for the recipe goes to Chocolate and Zucchini, a cookbook written by a French author. (She also writes a blog by the same name.) I've altered it slightly.

Yogurt Cake

1/3 cup vegetable oil (I use grapeseed), plus what's needed to oil the pan
1 cup plain yogurt (unsweetened), full fat or 2%
3/4 cup sugar
2 large eggs
1 teaspoon vanilla extract
1 Tablespoon rum (optional)
1 2/3 cups all-purpose flour
1 1/2 teaspoons baking powder
1 teaspoon baking soda
1/4 to 1/2  teaspoon salt 

Preheat the oven to 350 degrees Fahrenheit. Line the bottom of a 10-inch round cake pan with parchment paper, and oil the sides of the pan. OR, use a 10-inch springform pan and just oil the sides. I use a springform pan.

Whisk together the yogurt and sugar in a large mixing bowl. Add the eggs, one at a time, whisking well after each addition. Add the vanilla extract, the rum and the oil. Whisk again. 

In another bowl, sift the flour, baking powder, baking soda and salt. Add to yogurt mixture and whisk or stir lightly just until combined.

Pour the batter into the cake pan. Bake 35-40 minutes or until golden brown. A toothpick inserted into the cake should come out clean. Cool on a rack for 10-15 minutes, then loosen from pan and turn out onto the rack to cool. 

In the above photo I served the cake with a raspberry sauce made with frozen berries from last summer. It's equally good with any fruit sauce, or fresh fruit and whipped cream, or chocolate sauce.  

Friday, May 16, 2014

Rhubarb Cream Cheese Pie


Rhubarb's early appearance in the garden is a welcome sight after a long winter. Early settlers to North America considered it an aid to digestion and good health after a winter of eating preserved foods. 

The creamy baked topping on this pie is a perfect foil for the tart, fruity rhubarb filling. Although the recipe calls for an unbaked pie crust, I used a graham crust since I didn't feel like making pie pastry. We'll see how it turns out when I cut the pie. (edited to add: turned out just fine)

Rhubarb Cream Cheese Pie

Preheat oven to 425 degrees (F).

1 uncooked pie crust (10 inch)

Line a deep 10 inch pie plate with the pie crust and set aside. 

Filling:

1 cup sugar
1/4 cup cornstarch
1/3 cup water
3-4 cups chopped fresh rhubarb (cut into 1/2 inch sized pieces)

In a medium saucepan mix the sugar and cornstarch. Add the water and stir to combine. Stir in the fresh rhubarb. Cook over medium high heat, stirring almost constantly, until the mixture thickens and turns clear.

Pour rhubarb mixture into pie shell and bake for 10 minutes.

While the pie bakes, prepare the topping.

Topping:

1 package (8 oz) softened cream cheese 
1/2 cup sugar
2 eggs
1 teaspoon vanilla

Mix the cream cheese and sugar until creamy. Add the eggs, one at a time and beat until smooth.
Pour over the hot rhubarb.

Reduce the oven heat to 325 degrees. Return the pie to the oven and bake for 35-40 minutes. The topping should be golden brown. 

Cool thoroughly and serve with freshly whipped cream.

Edited June 16/23: I had so many ripe strawberries that I added one cup of them, coarsely chopped, to the rhubarb mixture and it was delicious! A great option!

Monday, March 17, 2014

Endive Ham Rolls aka Endives au jambon


Several years ago I found this recipe on a French language site, Les Fruits et Les Legumes Frais (Fresh Fruits and Vegetables). Actually, the site was then called 10 par jour or 10 per day. Regardless, I've enjoyed making this classic and simple dish from time to time. 

At the deli, I ask for the ham to be cut into slices about 1/8 inch thick. Thinner slices could be used, but you may want two or three per roll. The dish can be prepared ahead, refrigerated, and baked just before serving. As I prepared this dish today, I thought that two or three stalks of asparagus would make an equally good vegetable to roll up into the ham. I've adapted the recipe slightly from the original

Endive Ham Rolls

6 endives, washed, with outer leaves removed and ends cut off
6 slices ham, either from the deli or from a leftover baked ham, about 1/8 inch thick
3 Tablespoons butter
2 Tablespoons all-purpose flour
1/2 teaspoon Dijon mustard (optional)
2 cups milk
1/2 teaspoon salt, or to taste
freshly ground pepper, to taste
3/4 cup finely grated Swiss or Gruyère cheese

Steam the endives until tender, about 15 minutes. If you don't have a steamer, place them in about 1/2 inch of barely simmering water. Drain and let cool. This could be done ahead and the endives stored in the refrigerator for a day or two.

Cut the endives in half lengthwise. Cut the ham slices in half crosswise. This step will depend greatly on the size and shape of your ham slices. You want the ham to mostly cover the endives and to wrap around them with a bit of overlap.

Wrap the endives in the ham. Set aside.

Melt the butter in a saucepan, then stir in the flour. Let cook until barely golden. Do not let it get overly browned. Stir in the mustard, if using. Whisk in the milk and cook the sauce until thickened and bubbly. Remove from heat and season to taste with salt and pepper.

Pour about half of the sauce into an 11 x 8 inch baking dish. Arrange the ham and endive rolls on top in rows. Pour the remaining sauce over each row. Sprinkle with grated cheese. 

Bake for 20 - 30 minutes or until the sauce is bubbly and the rolls are hot throughout. The ham may brown a little on the edges. 

Enjoy with a green salad and some white wine. ooh la la


Meringue Chocolate Almond Cookies


Faced with a quantity of egg whites in the fridge, I made these meringue based cookies. They are light, but addictive. I think it has to do with the way they melt in your mouth, with the added flavors of almonds and chocolate. Easy to make, and they are gluten and dairy free (depending on the chocolate chips used.) 

Meringue Chocolate Almond Cookies

2 egg whites, at room temperature

1/2 teaspoon cream of tartar
1/2 cup sugar
1/2 teaspoon vanilla
1 cup chocolate chips or finely chopped chocolate (I used a combination of both)
1 cup sliced almonds, blanched or not

Preheat oven to 300 degrees F. Line two baking sheets with parchment paper.

In large mixing bowl, beat egg whites until foamy. Add the cream of tartar and beat until soft peaks form. Begin adding the sugar, two tablespoons at a time, and beat until the mixture is stiff and glossy. Beat in the vanilla. Fold in the chocolate and almonds with a silicone or wooden spatula. 

Drop teaspoonfuls of the mixture onto parchment lined baking sheets. Allow for some spreading. Bake 20 - 25 minutes. Let the cookies cool on the parchment, then carefully remove. Store in an airtight container for up to 5 days. 

Monday, March 10, 2014

Bavarian Apple Torte


I posted this over on my main blog, but wanted it here, too, for referencing.


Apple desserts - yum! I first tasted this torte at the home of my cousin Caroline and was happy to see it show up in a family cookbook a few years later. Not overly sweet, but just sweet enough. Apples, cream cheese, cinnamon, and almonds on an easy crust. This really is easier than apple pie. 

Layer One:
1/2 cup butter
1/3 cup sugar
1/4 teaspoon vanilla
1 cup all-purpose flour

Preheat oven to 350 degrees. Cream butter, sugar and vanilla. Blend in flour to make a soft dough. Spread or press on bottom of 9 inch springform pan.

Layer Two:
8 oz cream cheese, softened
1/4 cup sugar
1 egg
1/2 teaspoon vanilla

Cream together the cream cheese and sugar. Add the egg and vanilla and mix well. Pour onto pastry in pan.

Layer Three:
1/3 cup sugar
1/2 teaspoon cinnamon
4 cups peeled, sliced apples (I used three Spartan apples and had just the right amount to fit on the pan - I didn't measure them)
1/4 cup sliced almonds (optional)

Combine the sugar and cinnamon, add the apples and toss together. Arrange on cream cheese layer and sprinkle almonds on top. 
Bake at 350 degrees for 15 minutes, then increase baking temperature to 400 degrees and bake until the apples are tender, about 25 minutes more. If the almonds begin to brown too quickly, cover loosely with aluminum foil.

Cool slightly. Remove from pan, loosening edges with a knife first. Cut into wedges and serve warm or at room temperature.


Thursday, February 6, 2014

Bacon and Date Snacks


These little morsels are sweet and salty at the same time. Easy to make, easy to eat. Barely a recipe with just two ingredients.

Dried Pitted Dates
Bacon Slices

Cut bacon slices so that they can be wrapped around the dates. I cut my slices in half, then ended up trimming a little of the fatty end off of the bacon before wrapping the dates. 

Wrap the dates, slightly overlapping the bacon ends, and fasten with a toothpick. 

Place on a parchment paper lined rimmed baking sheet and bake at 350 degrees for 15-20 minutes or until the bacon is crisp. Use the top third of the oven so the bottoms don't burn. Turn the rolls over about halfway through. Cool slightly before eating so as not to burn your mouth.

If you like, stuff an almond into the date before wrapping it in bacon. I prefer them without the almond - the crunch of the bacon and the melting sweetness of the dates are enough for me.   

Brie, Bacon and Onion on Polenta Squares


One of the things I enjoy most about planning a party or event is deciding what food to make. Our third grandchild's baby shower recently was a morning event, so savoury things appealed to me more than sweets. These polenta squares, based on a photo, were easy to make with much prep done in advance, and they tasted so good. The softly caramelized onions, the melting Brie, the crunchy salty bacon and the cornmeal base all melded together wonderfully. 

The polenta can be made the day before and chilled, covered with plastic wrap. Caramelize the onions ahead of time, too, and keep them in the fridge. I also baked the bacon, cut it into pieces and refrigerated it (stuck waaay back in the fridge so I wouldn't sneak bits.) The topping recipe follows the polenta square recipe.

Brie, Bacon and Onion on Polenta Squares

polenta:
4 cups of chicken broth, or vegetable broth
2 cups of polenta corn
2 teaspoons of pizza spice or herbes de Provence, optional
1/2 teaspoon salt


olive oil for greasing baking sheet and brushing on top

Bring the broth to a boil over high heat in a large saucepan. Slowly stir in the polenta corn. Add the spice/herbs and salt. Reduce the heat to low and let the mixture simmer until very thick, about 15-20 minutes. Stir frequently to prevent sticking. 

While the mixture is cooking, oil a rimmed baking sheet with olive oil. When the mixture is thick, pour it into the prepared baking sheet. Level out the mixture with a flat metal spatula. I found an off-set spatula very useful. Spread the mixture 1/4 to 1/2 inch thick. You want the squares to be able to hold the toppings without being floppy when picked up. 

Let the polenta cool. Brush the top with olive oil, cover with plastic wrap and refrigerate until chilled.

When ready to serve, cut the polenta into squares, about 1 1/2 inches square. Top each with a spoonful of caramelized onions, a small wedge of Brie cheese, and a few pieces of crisp bacon.

Bake the squares at 350 degrees for 10-15 minutes, or until warmed through and the Brie is softened and slightly melting. Serve hot or warm.

toppings:
2 large yellow onions, peeled, halved and sliced
2 Tablespoons olive oil
coarse salt to taste
1/2 teaspoon dried thyme

Heat the oil in a skillet over medium heat. Add the onions and gently saute them until softened. Add salt to taste and the thyme. Continue stirring and cooking the onions until they are very soft and just beginning to caramelize. Remove from heat and set aside to cool, or make ahead and refrigerate until needed.

Brie cheese (one small wheel), cut into small wedges

Bacon, about 8 slices, baked until crisp at 350 degrees, drained, and cut crosswise into 1/2 inch pieces